Remember those flat sketches that never quite captured the real thing? You draw a square or circle, but it stays two-dimensional on the page. Frustrating, right? Many beginners face this issue. The fix comes from basic shapes plus a few tricks like adding planes and smart shading.
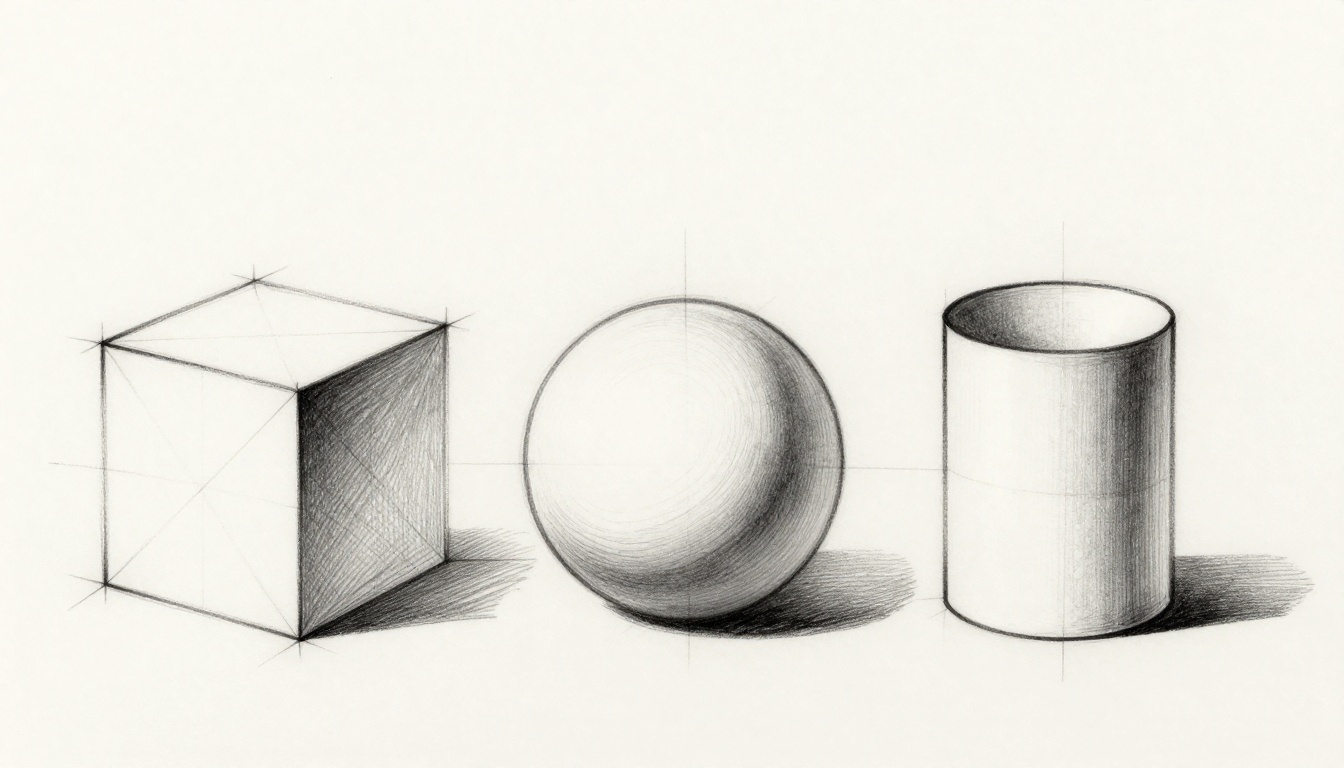
How to draw 3D objects from basic shapes starts with simple forms. You build depth by creating multiple faces or curved contours. Then shade to show light and shadow. This post breaks it down. First, tackle boxy shapes like cubes and pyramids. Next, handle round ones such as spheres and cylinders. You’ll get shading tips and ways to dodge common errors.
Grab your pencil and paper now. Let’s turn flats into forms that pop.
Build Solid Cubes from Simple Squares in Just Four Steps
Cubes form the base for many drawings. Start with squares because they stack easily into depth. Use light pencil lines at first. This lets you adjust without mess.
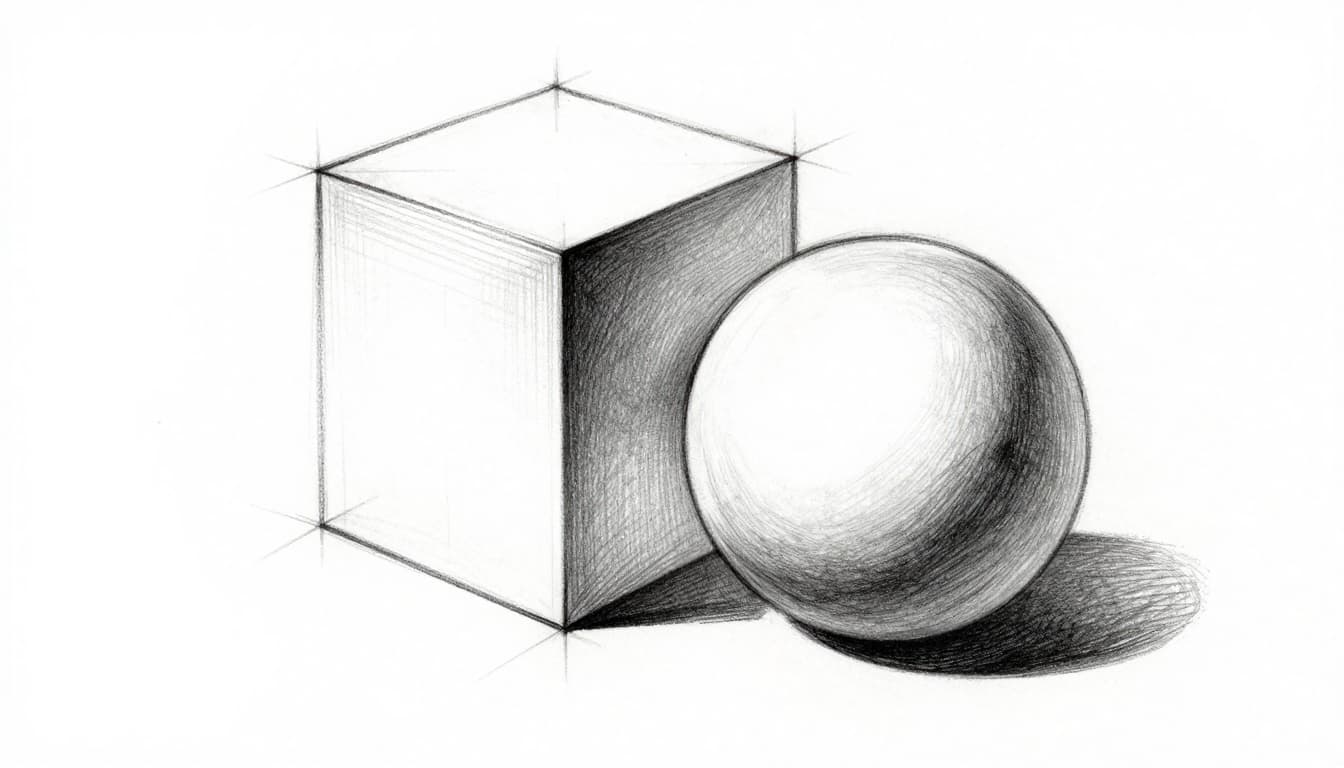
Draw two squares that overlap a bit. Make the front one full size. Set the back one smaller and shifted right for one-point perspective. All lines meet at a vanishing point on the horizon. This tricks the eye into seeing distance.
Connect each corner of the front square to the matching corner on the back. Keep lines straight. Use a ruler if needed. You now see the cube’s sides.
Erase lines hidden behind the front face. Clean edges remain. Your cube has three visible planes: front, top, and side.
This method builds confidence. It shows how connecting planes creates volume. Practice five cubes at different angles. For more details on cube basics, check this beginner’s guide to 3D shapes.
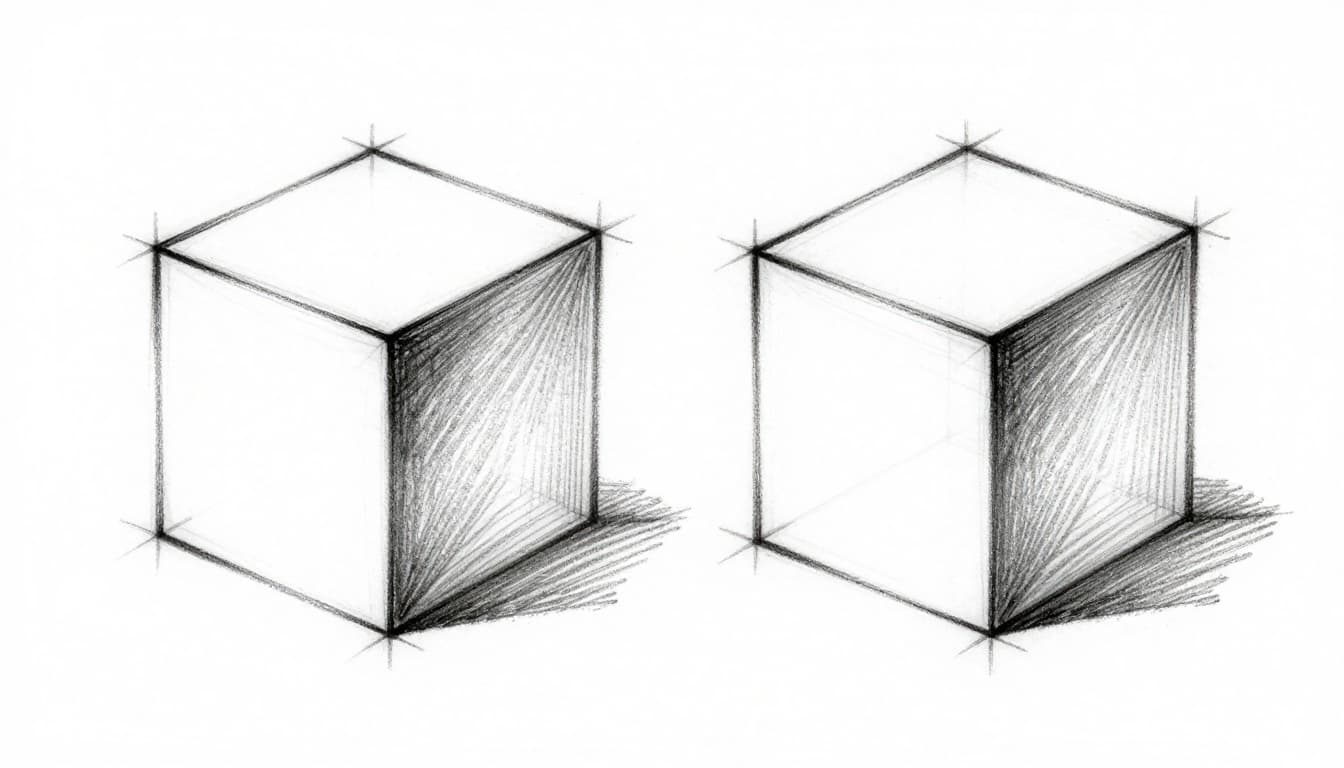
Add Shading to Make Your Cube Jump Off the Page
Shading sells the 3D effect. Pick a light source, say top-left. Faces toward it stay light. Others get darker.
Start with the face farthest from light. Fill it medium gray. Blend toward edges with your finger or tissue. Add gradients: lightest at top, darkest bottom.
Use heavier lines on far edges. This adds contour. Avoid flat color everywhere. Vary tones for roundness, even on sharp shapes.
Test by tilting your paper. Does it hold light? Adjust as needed. These steps make cubes look solid.
Craft Pyramids and Prisms That Look Deep and Real
Pyramids and prisms share straight edges. Both use connecting lines for depth. Proportions matter most.
For a pyramid, draw a vertical center line. Add two angled lines from the top, same length. Connect the base with horizontals. Erase extras inside.
The apex pulls lines together. Shade undersides darker. This points depth toward the tip.
Prisms start with a base shape, like a triangle. Draw lines back from each corner. Parallel them to show sides. Connect the back base.
Keep front base larger. This follows perspective. Both shapes gain pop from multiple planes.
Practice by drawing ten each. Stack a pyramid on a prism base. See real objects first, like a roof or tent. Follow this pencil tutorial for 3D pyramids for exact steps.
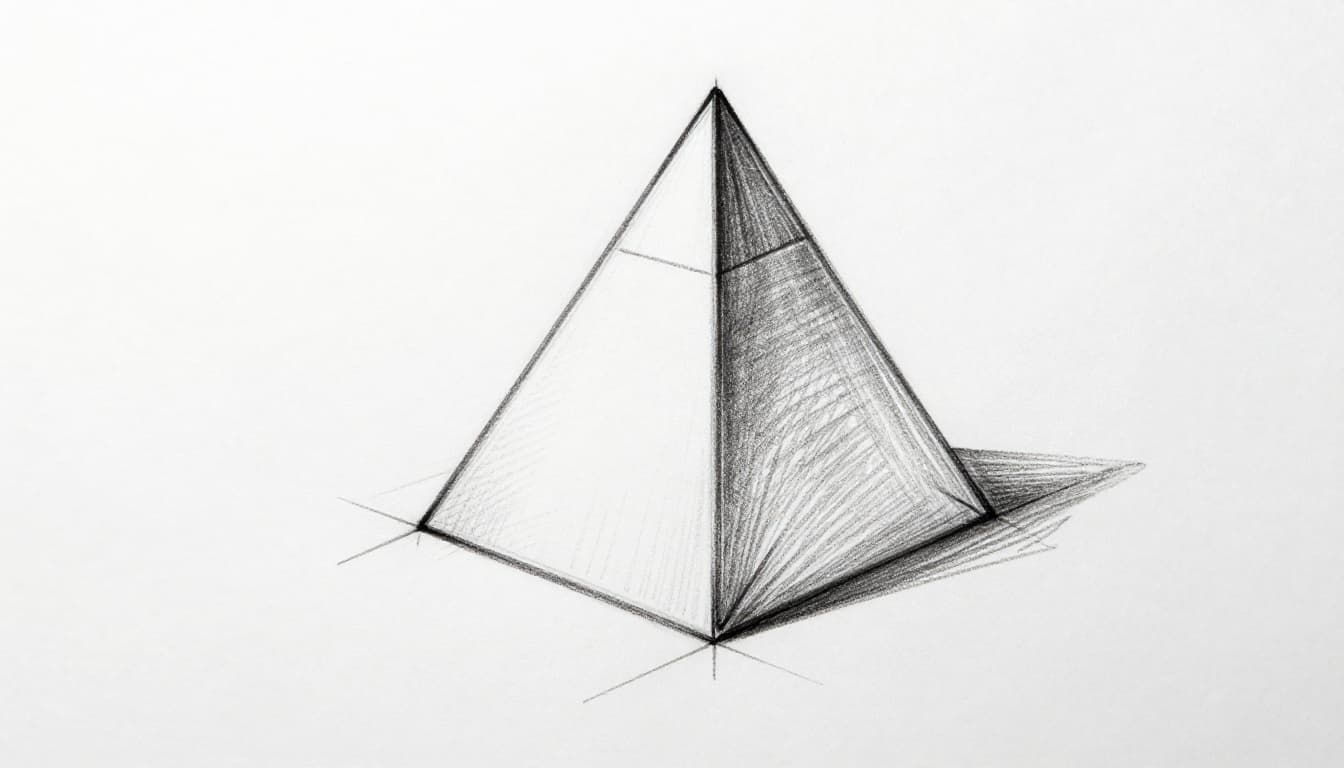
Group these as hard-edge forms. More faces mean stronger 3D. Check angles with your pencil against the page.
Draw Lifelike Spheres and Cylinders Using Contour Magic
Round shapes differ. No straight edges here. Contours wrap the form instead.
Outline a circle for the sphere. Add curved lines across it. Horizontal ones space even but tighter at edges. Vertical ones do the same.
These lines suggest wrapping. Shade between them, darkest opposite light. The surface curves alive.
Cylinders act like stretched spheres. Draw ovals top and bottom. Vertical contours stay straight. Horizontals curve around.
Shade sides away from light darker. Top ellipse light, bottom dark. It mimics a can or pipe.
Think of contours like gift wrap. They hug the bulge. This beats boxy methods. For contour examples, see this sphere drawing tutorial.
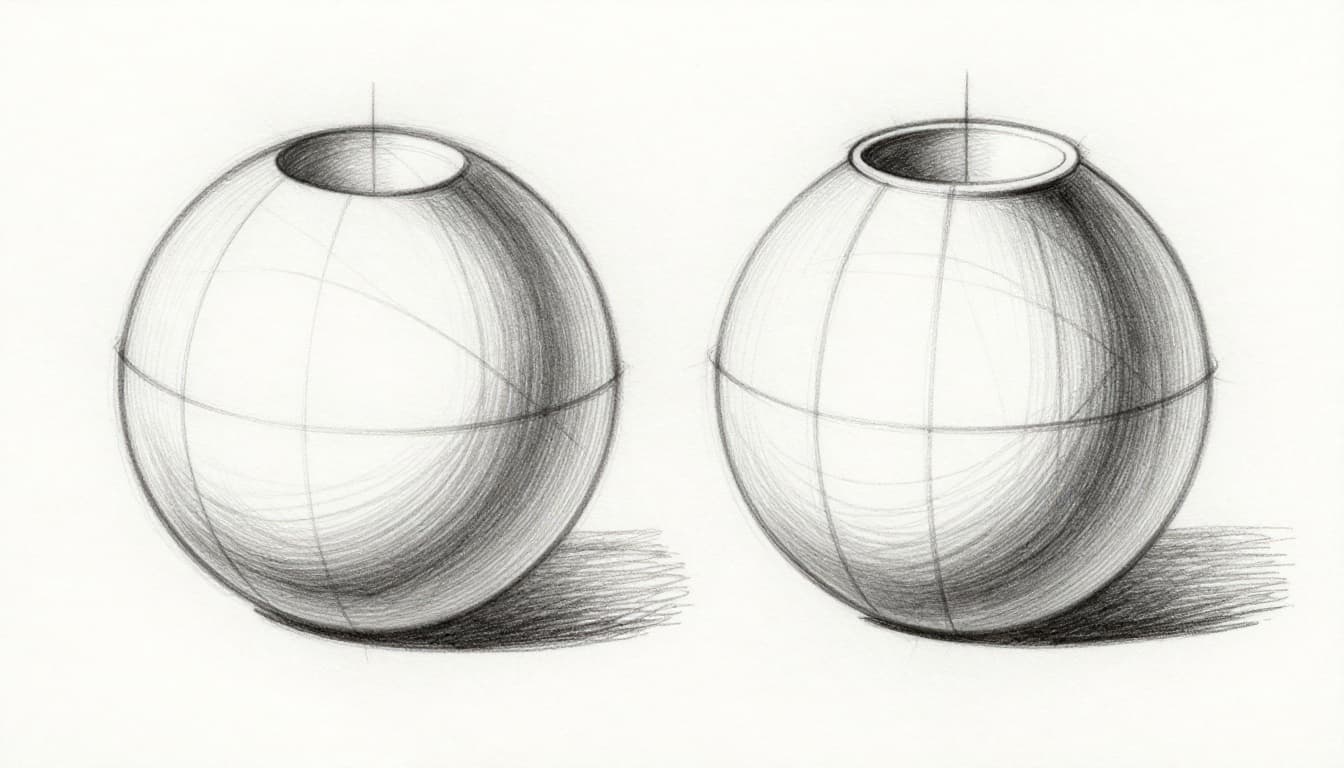
Pro Shading Hacks for Round Shapes
Contours guide shading. Highlight the light side bright. Add core shadow where form turns.
Include reflected light on edges. Blend smooth with tissue. Avoid harsh lines; go gradient.
Flat shading kills roundness. Vary tones across surface.
Shading Essentials and Smart Tips to Elevate Every Drawing
Shading rules apply everywhere. Faces away from light darken first. Keep source consistent, like top-left always.
Distant parts lighten overall. Multiple planes catch varied light. This builds natural depth.
Start light sketches. Check proportions by measuring with pencil. Sit straight; focus short bursts, 20 minutes daily.
Use references from photos. Break objects into shapes. Practice cube grids for angles.
In March 2026 trends, daily shape drills top lists. Copy real lights and shadows for quick gains.
Steer Clear of These Traps That Flatten Your 3D Attempts
Few faces doom drawings. Add more planes always.
Uniform shading bores. Vary tones per surface.
Wrong connections twist forms. Double-check lines.
Proportion slips shrink depth. Measure often.
Fixes work fast. Review with a checklist: planes count? Light consistent? These beat flats every time. See common beginner mistakes for more.
Basic shapes plus planes and shading create 3D success. You now know steps for cubes, pyramids, spheres, and more. Practice daily builds skill fast.
Combine forms next, like a house from prisms. Share your sketches in comments. Anyone masters this with time. Start drawing 3D objects from basic shapes today.