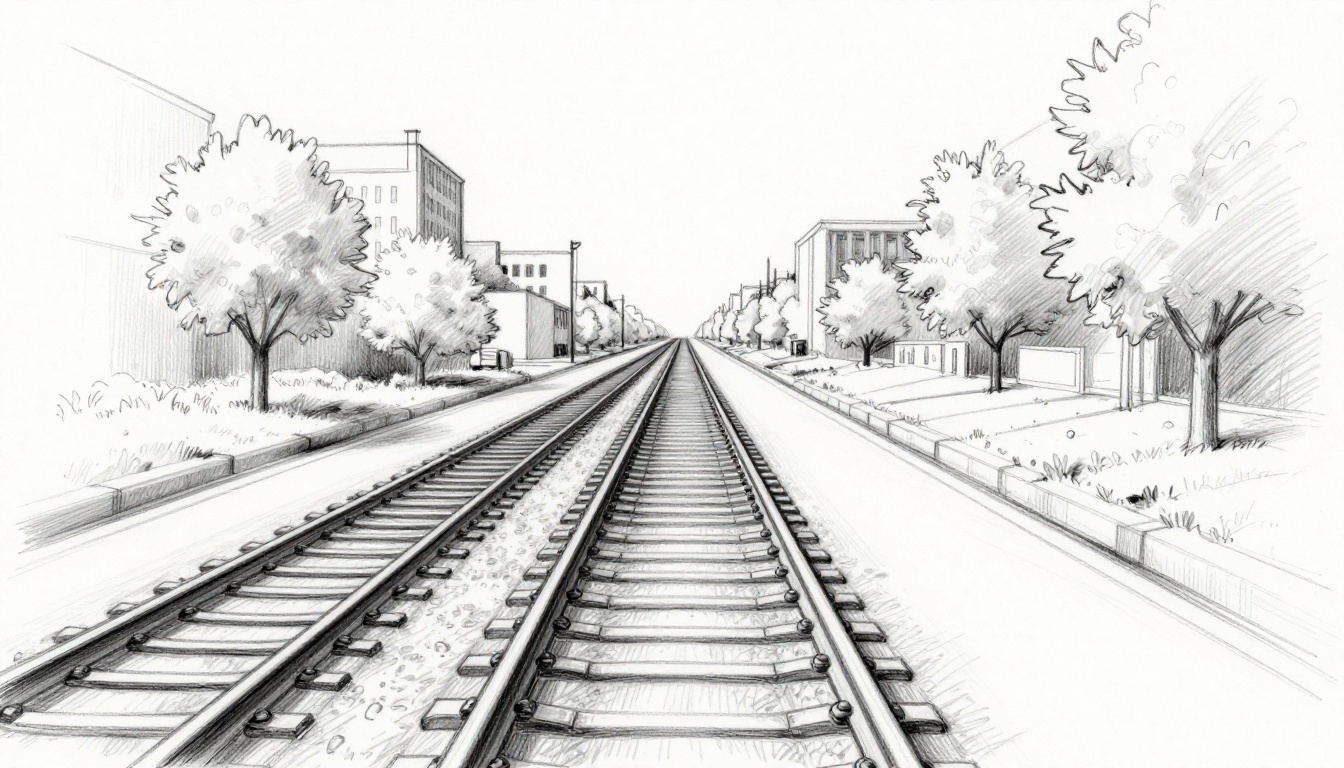
Ever notice how train tracks seem to touch far away? Or how road edges pull together on the horizon? You see this every day. Those tricks make flat scenes feel deep and real.
The horizon line marks the spot at your eye level where sky meets ground. It’s a straight horizontal line in drawings. The vanishing point sits on that line. Parallel lines rush to it and create 3D depth. Beginners love these tools. They turn simple sketches into drawings that pop.
Many new artists skip them. Their work looks flat or wonky. You don’t want that. This post breaks it down easy. First, we cover the horizon line and eye levels. Next, vanishing points and their magic. Then, how they team up in one, two, or three-point views. You’ll spot them in real life and art. We fix common mistakes too. Finally, grab pencil tips and 2026 apps for practice.
Stick around. You’ll draw realistic scenes fast. Let’s start with eye level.
Nail Your Eye Level with the Horizon Line
The horizon line sets your viewpoint height. Draw it straight across your paper. It matches where your eyes sit in the scene. Stand tall, and it rises. Sit low, and it drops.
Place it high for bird’s-eye views. You look down on tops of things. Put it in the middle for normal eye level. You see sides evenly. Drop it low for worm’s-eye angles. Undersides show up bold.
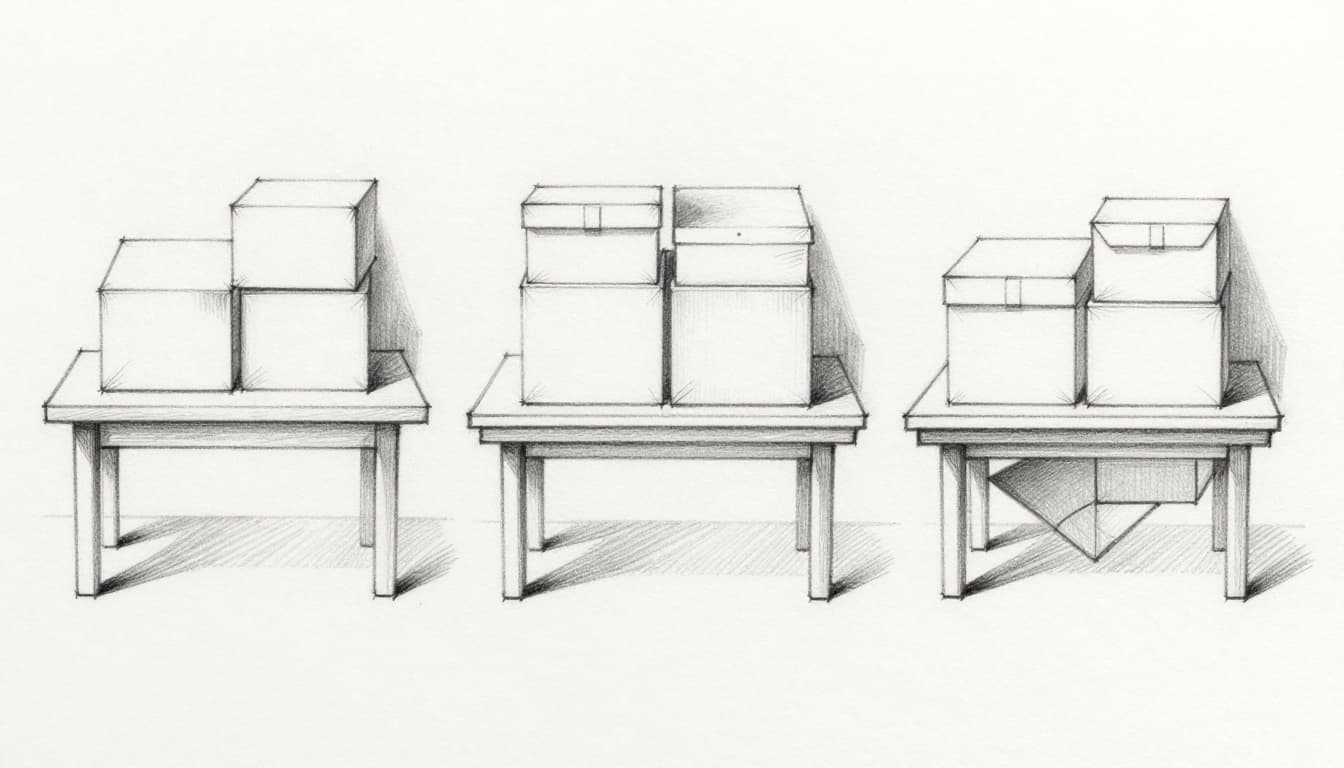
Think of a table. From standing, the horizon sits high. You spot the top surface. Sitting drops it lower. Legs fill the view. Always keep it parallel to real ground. Pencil it lightly first. That guides everything.
Change the height, and drama shifts. High horizons feel grand. Low ones intimidate. Your choice controls mood.
For more on eye level placement, check this horizon line guide from Draw Yager.
High, Low, or Middle: Pick the Right Spot for Your View
High horizons reveal object tops. Sketch a city from a hill. Roofs dominate. Drones capture this in photos.
Middle horizons balance views. Street level works here. You see fronts and sides equal.
Low horizons expose bottoms. Look up at trees from ground. Legs and undersides stretch tall.
Match your real view. Photos help. Stand where you draw. Note eye height. Transfer that to paper.
Spot Where Lines Converge: The Vanishing Point Magic
Parallel lines meet at the vanishing point. It’s a dot on the horizon line. Roads fool your eye this way. They stay even but seem to squeeze together.
True parallels share one point. Others run straight. In drawings, slant sides to the point. That builds depth.
One point suits straight-on scenes. Two points handle corners. Three adds tilt for tall stuff. Points stay on the horizon. Verticals slant only in three-point views.
Road edges hit one spot. Building sides grab two. Your eye buys the 3D lie.
See how they work in sketches with this vanishing points breakdown.
One Point, Two Points, or Three: Choose Based on Your Scene
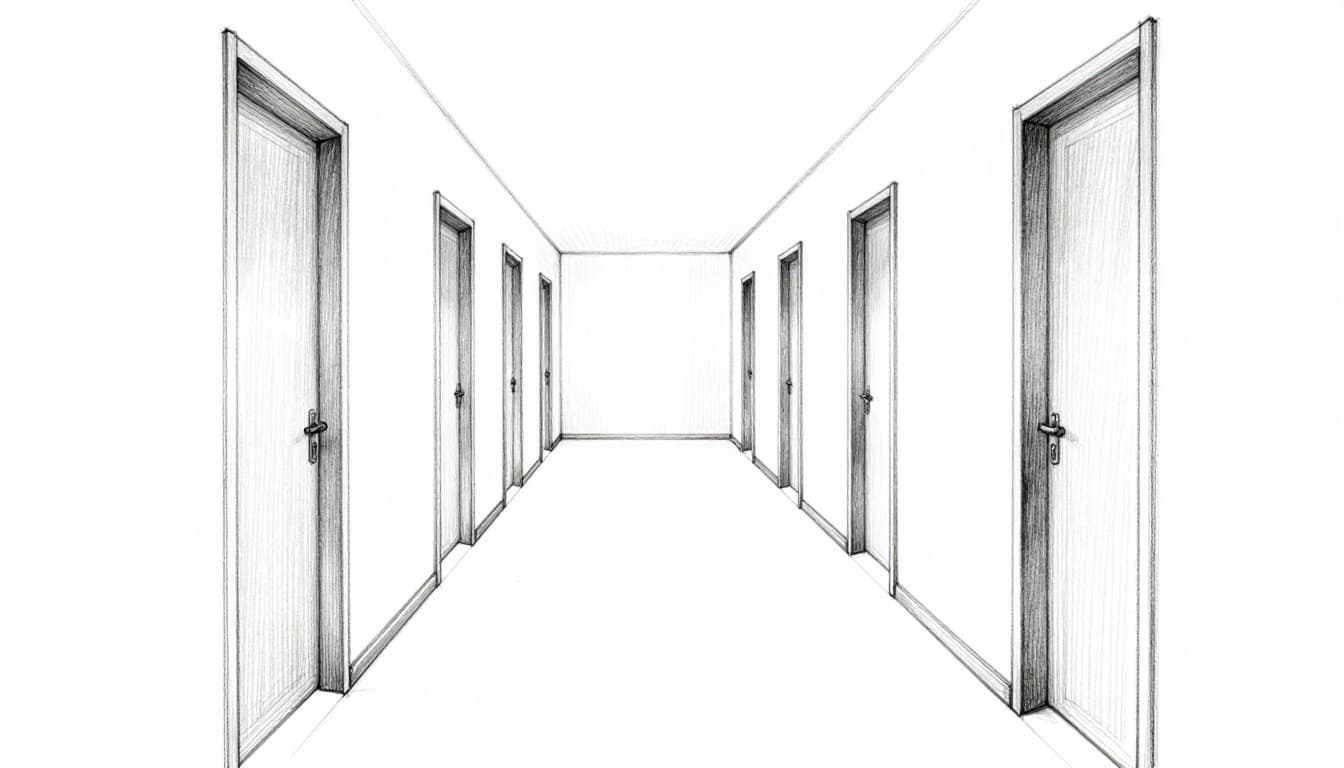
One-point fits head-on looks. Hallways pull everything center.
Two-point shows corners. Buildings turn at angles. Sides hit left and right points.
Three-point amps drama. Skyscrapers lean in. Verticals converge up or down.
Pick by your subject. Straight ahead? One point. Side angle? Two. Extreme height? Three. Simpler views stay realistic longest.
Combine Forces for Realistic Depth: Perspective Types Explained
Horizon and points build illusions together. Draw the line first. Add points next. Slant parallels to them. Horizontals stay level. Verticals drop straight.
Build scenes step by step. Start with horizon. Place points. Draw converging lines. Add details that shrink.
One-point suits roads. Two-point boxes houses. Three-point towers. Trace photo lines to measure. Extend them to find points.
This combo fools the brain. Flat paper turns space-like.
One-Point: Perfect for Straight-Ahead Views Like Hallways
Draw horizon middle. Place one point center.
Lines from walls, floor, ceiling rush to it. Add doors. They shrink smaller back.
Details fade toward the point. Depth jumps out.
Two-Point: Capture Building Corners with Ease
Set horizon. Place two points wide apart.
Front vertical stays plumb. Sides converge left to one, right to other.
Space points far. Close ones warp like fish bowls.
Three-Point: Add Drama to Tall Structures
Start with two-point base. Add third point high or low.
Verticals slant to it. Skyscrapers tower real.
Use for up or down tilts.
Hunt Them Down in Real Life and Art Masterpieces
Spot them daily. Roads meet at horizon. Tracks do too. Building rows narrow sideward.
Photos reveal them. Extend edges. They cross at points.
Art masters nailed this. Renaissance streets vanish perfect. Comics twist views bold.
Grab your phone. Snap a street. Trace lines. Horizon and points appear.
Everyday Sights Like Roads and Railroads
Street photos show one point center. Sides converge.
Rails pull tight distant. Analyze any path.
Iconic Artworks Using Killer Perspective
Old city views pack two points. Interiors one-point deep.
Modern panels mix three for action.
Skip These Traps: Fix Beginner Mistakes Fast
Crowd points close. Scenes distort. Space them wide or off page.
Drop points off horizon. Depth fails. Anchor there always.
Force all lines to one point. Corners need two. Match parallels only.
Mix directions wrong. Use separate points per set.
Ruler checks help. Before and after fixes wow.
Don’t Crowd Your Vanishing Points Too Close
Tight points curve lines fish-eye. Push them apart. Distortion drops.
Always Anchor to the Horizon Line
Horizontals hit points there. Verticals stay straight in basic views.
Practice Now: Hands-On Exercises to Build Skills
Grab pencil and paper. Do these drills daily. Ten minutes builds muscle.
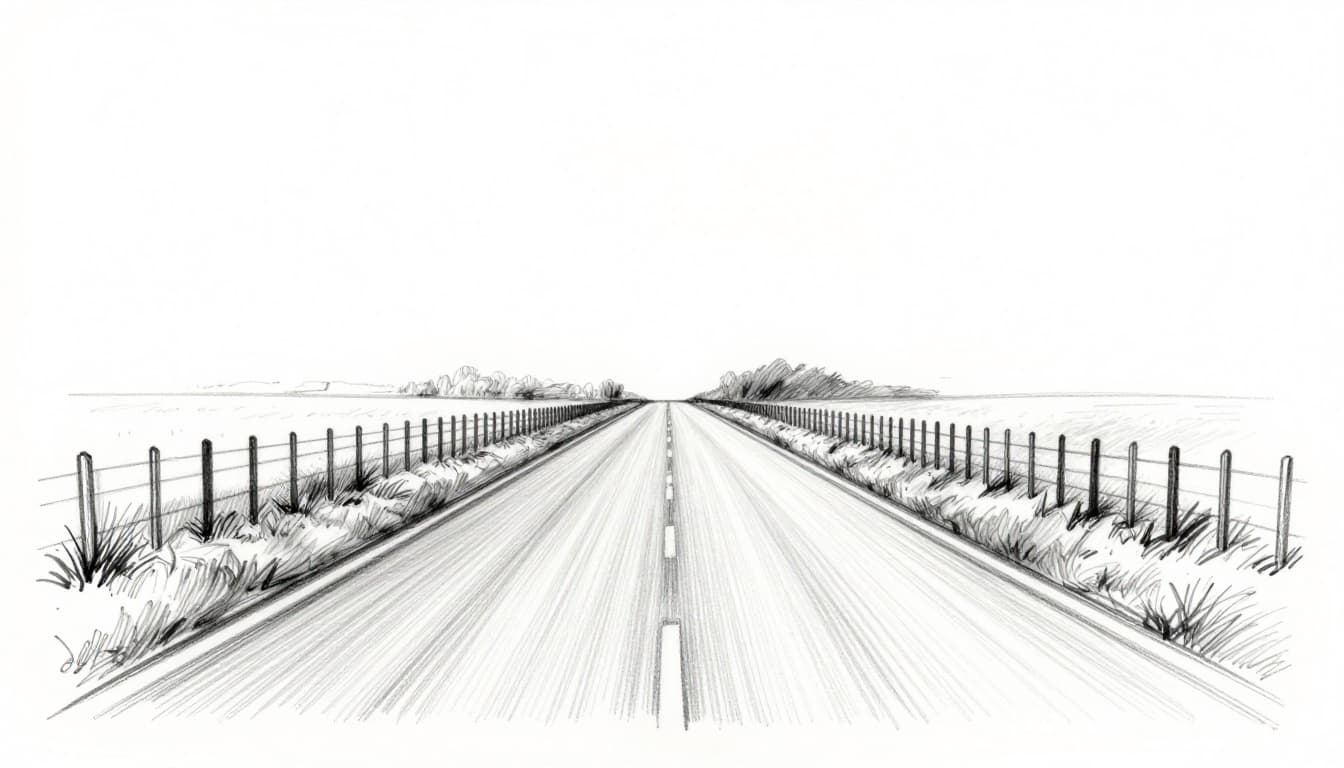
First, road vanish. Horizon middle, point center, edges converge, trees shrink.
Next, corner box. Two points wide, front vertical, sides slant.
Trace photo lines. Redraw with found points.
Rotate cubes angle to angle.
Tower up in three-point.
Apps speed it in 2026. Concepts offers grids free. Clip Studio rotates 3D refs. Krita rulers help no cost.
| App | Key Beginner Features | Platforms | Free? |
|---|---|---|---|
| Concepts | Perspective grids (1/2/3-point), align tools | iOS/Android | Free with upgrades |
| Adobe Fresco | Live brushes, pressure sensitivity | iPad/iPhone/Android | Fully free |
| Clip Studio Paint | 3D angle refs, flip canvas | PC/Mac/iPad/Android | Trial then paid |
| Krita | Rulers for perspective | PC/Mac/Android | Free |
Start mobile with Concepts. Turn grid on. Sketch to points.
YouTube searches like “find horizon in images” show fast.
Sketch a Road Vanishing into the Distance
Horizon middle. Point center. Edges to it. Fence posts smaller back.
Draw a Simple Box from the Corner
Two points ends. Vertical front square. Sides converge each way.
Reverse-Engineer a Photo’s Perspective
Extend lines pencil. Note horizon, points. Redraw clean.
Mastery comes quick. Horizon sets your level. Points drive depth. Practice kills errors.
Anyone draws pro with reps. Try a road sketch now. Share your scan online. Fire up Concepts or Krita. Check YouTube grids.
Pros grid digitally in 2026. You can too. Keep sketching. Your art levels up fast.