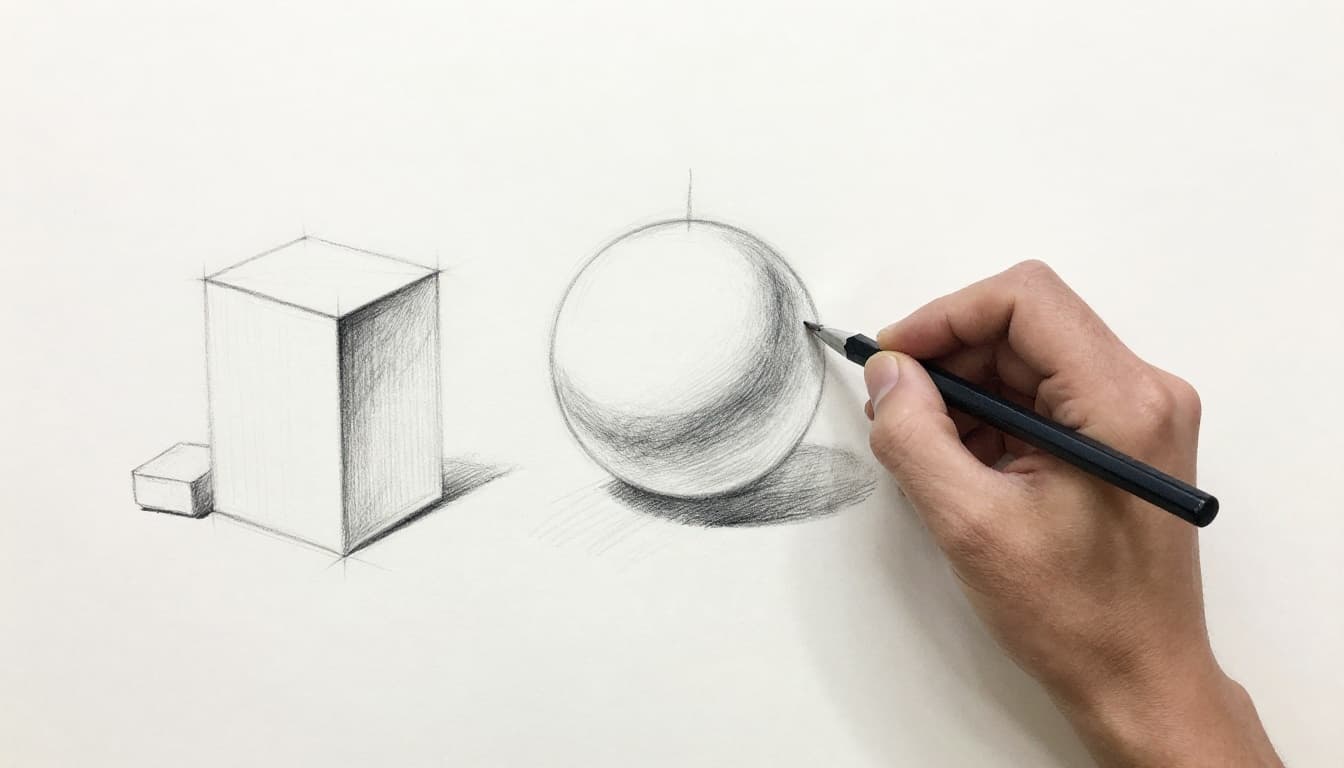
You stare at a plain circle on your paper. It looks flat, boring. But picture it as a shiny apple or a glowing orb. You can make that happen.
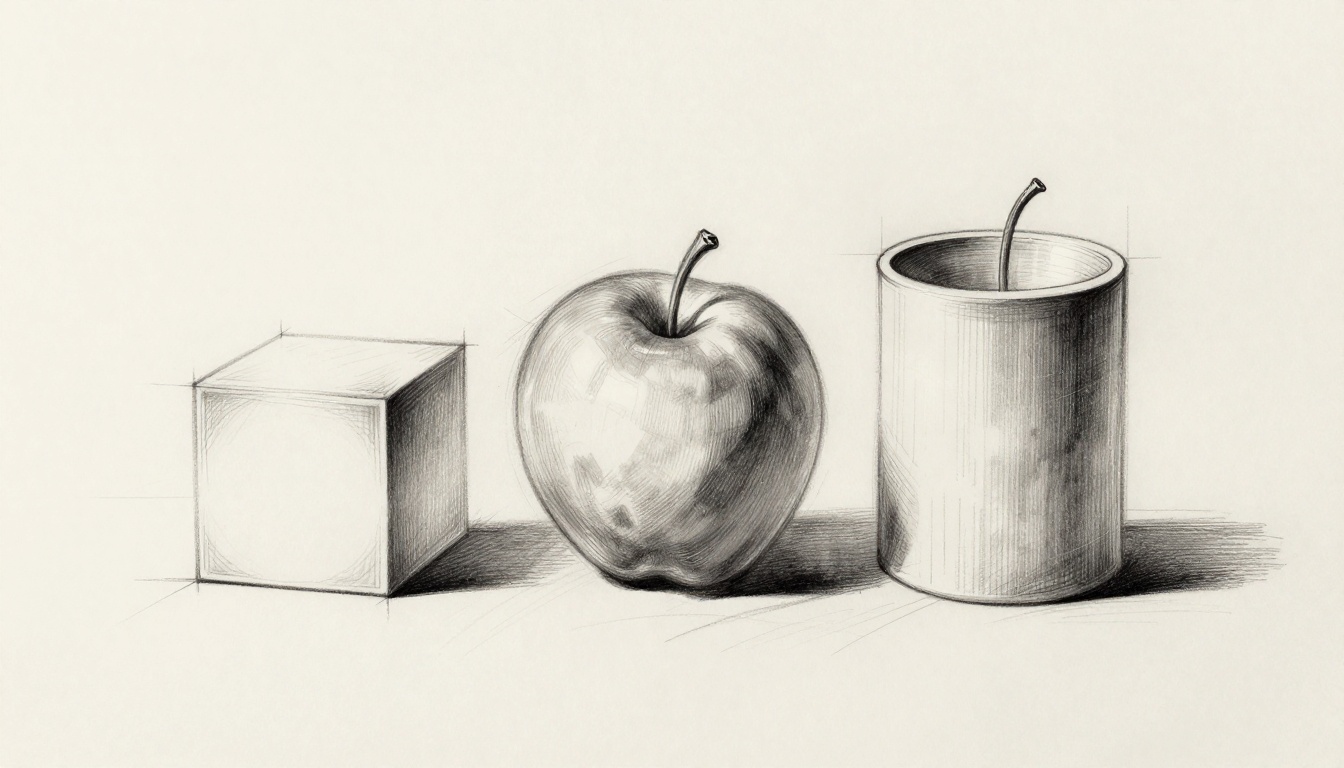
Basic shapes like circles, squares, and rectangles turn into spheres, cubes, and cylinders with shading and perspective. These tricks work for pencil sketches, Procreate layers, Photoshop brushes, or Blender previews. You’ll skip common pitfalls and grab tools from HB pencils to 2026 AI apps.
Follow these steps, and you’ll create forms that pop off the page in under 10 minutes each. Ready to add depth?
Master the Basics: Light, Shadow, and Perspective That Bring Shapes to Life
Light hits a shape and creates shadows. One main light source works best for beginners. It forms highlights where rays bounce straight back. Core shadows fall on the opposite side. Reflected light sneaks in from nearby surfaces. Cast shadows stretch away on the ground.
Perspective adds the third dimension. Horizon lines mark eye level. Vanishing points pull edges back in space, especially for cubes. Shadows wrap around curves on spheres or cylinders. They don’t slice straight across.
Mid-tones fill most of the surface. They match the shape’s base color, blended smooth. Think of a ball in sunlight. The top gleams bright. Sides fade to gray. Bottom stays darkest.
Start with an outline. Set your light. Layer tones from light to dark. Refine against photo references. In 2026, many sketch flat first. Then AI generates a base render for hand tweaks. This hybrid speeds things up.
Ready to see flat shapes turn full?
Pick Your Light Source and Horizon Line First
Choose one key light, plus soft fill light. Top-left direction feels natural, like window sun. Draw an arrow for it. Add a horizontal horizon line across your page.
This setup keeps shadows consistent. Every highlight and dark matches the angle. Digital artists use guide layers for these lines. They lock in place.
For example, top-left light hits spheres at 11 o’clock. Cubes get bright top and side faces. You avoid random dark spots.
Layer Tones Right: From Bright Highlights to Deep Shadows
Build tones in order. Start with the brightest highlight. Add mid-tones next. Then core shadow. Follow with reflected light. Finish in deepest occlusion where light can’t reach.
Blend gradual for realism. No harsh flat zones. Highlights glare like sun on a wet ball. Core shadows curve soft.
In 2026, subsurface scattering adds organic glow, like light through fruit. Check step-by-step sphere shading guides for visual examples.
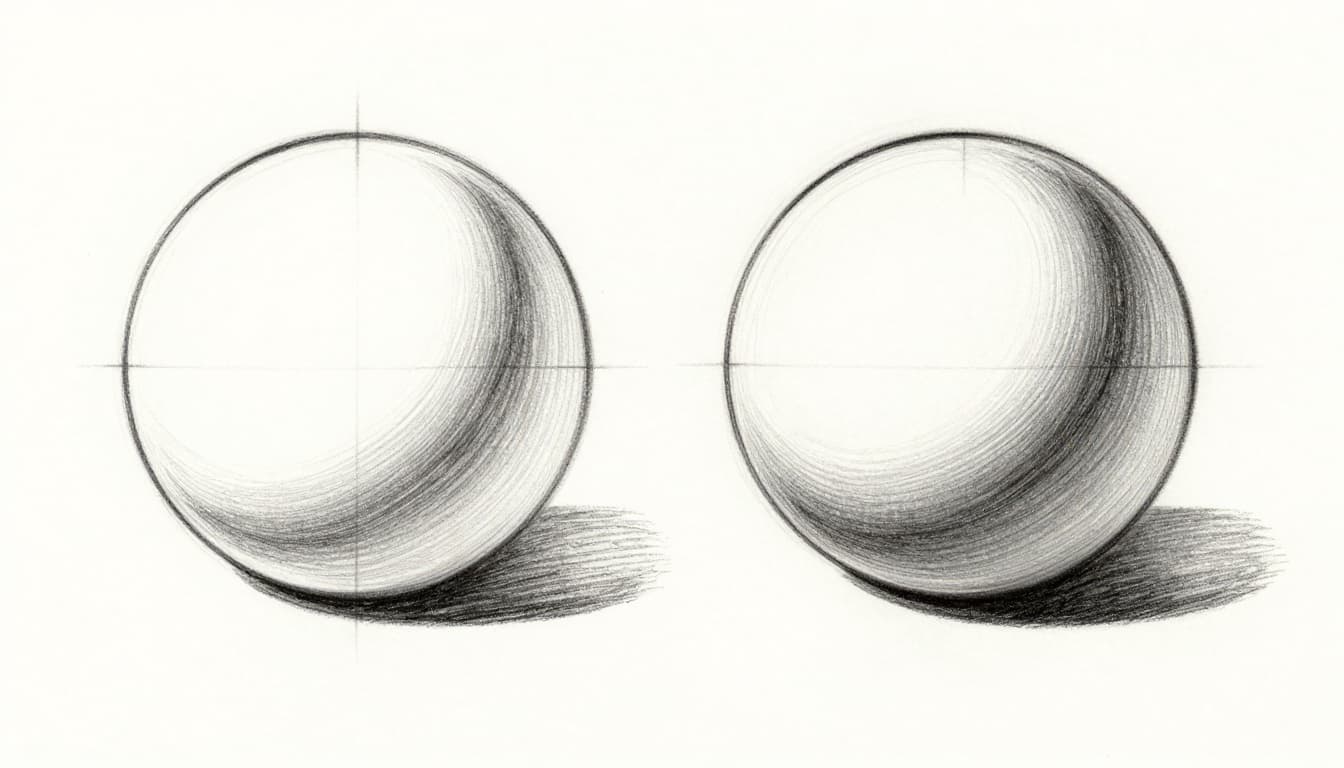
Step-by-Step: Draw a Realistic Sphere from a Plain Circle
Grab a circle outline. Assume top-left light. Fill the whole shape mid-gray first. This sets your base tone.
Next, add a crisp highlight spot at top-right. Make it brightest white. Blend a curved core shadow around the lower equator. Soften its edges inward.
At the bottom, place subtle reflected light. Lighter gray bounces up from an imagined ground. Below the sphere, draw a cast shadow oval. Fade its edges.
Your circle now floats with volume. Digital tip: Clip a soft airbrush layer for shadows. Use multiply mode.
Compare to a photo reference. Pro artists do this every time. Avoid over-blending into mud.
Add the Magic Touches for Depth and Shine
Place the highlight opposite the core shadow. The terminator line curves gentle between them. Reflected light sits low, cooler than the highlight.
In digital apps, multiply shadows over your base layer. This preserves highlights. Result: a sphere that shines.
Build a Sturdy Cube from a Flat Square with Easy Perspective
Start in two-point perspective. Turn your square into a trapezoid. Place vanishing points on the horizon line. Draw six faces converging back.
Light the front and top faces brighter. Mid-tones on edges facing light. Darken back and bottom faces. Add edge highlights where light grazes.
Stretch a cast shadow from the base. Make it angular, matching perspective. Round corners slight with soft tones.
Digital help: Snap to a grid layer. Multiply for shadows. Cubes anchor illustrations well because angles vary per face.
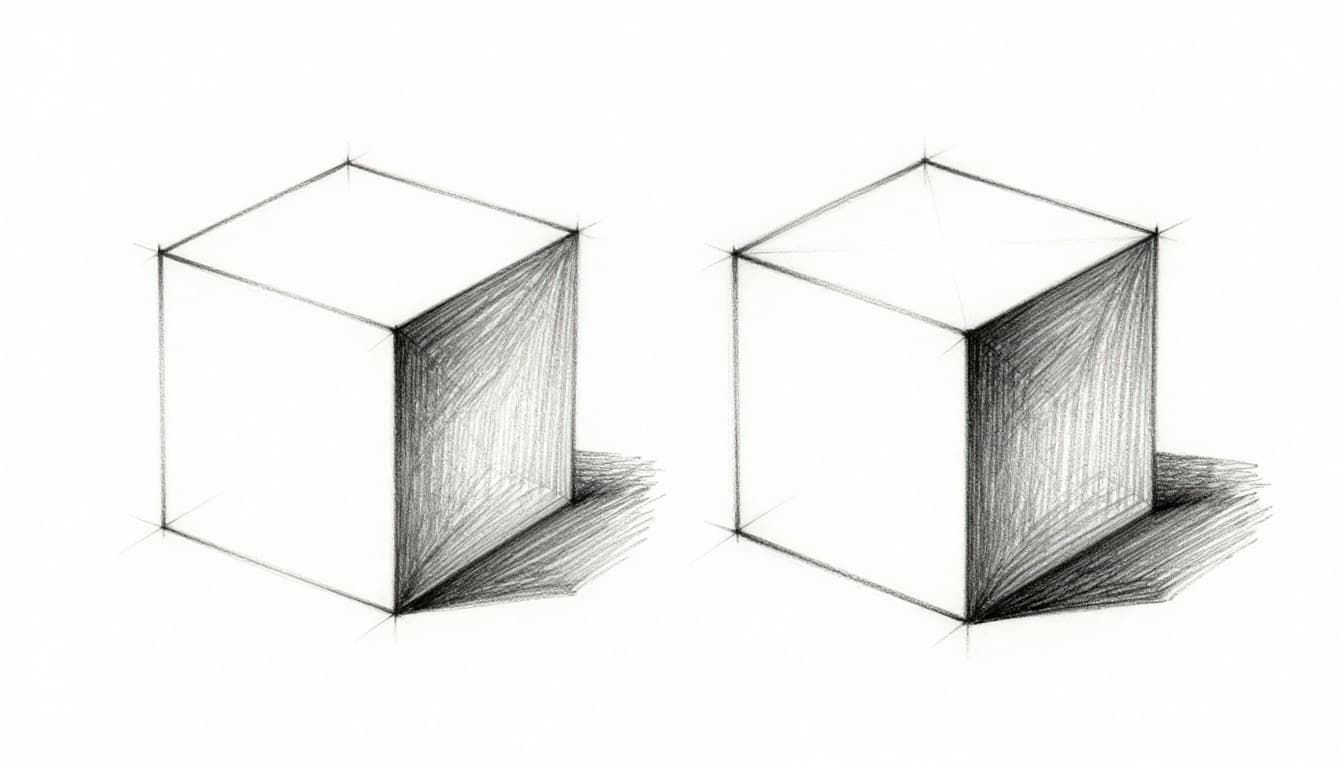
Nail the Perspective So It Does Not Look Flat
Tilt top edges inward toward vanishing points. Back faces shrink smaller. Never draw perfect squares on all sides. That kills depth.
For tutorials on cube perspective, see this beginner’s 3D cube guide.
Shape a Cylinder from Rectangles That Feels Solid and Curvy
Outline two ellipses, top and bottom. Make the far ellipse narrower. Connect with straight or tapered sides.
Wrap a shadow band around the middle. Follow the ellipse curve. Add a highlight stripe near the top rim. Terminator curves along the form.
Bottom gets reflected light plus contact shadow. Cast shadow arcs away.
Like a coffee mug study. Digital: Use procedural brushes for metal or wood textures.
Curve Your Shadows to Match the Round Sides
The shadow band hugs the ellipse, not straight. Terminator follows the round profile. This sets cylinders apart from boxes.
Explore cylinder shading techniques for more tips.
Gear Up with Tools and 2026 Trends to Speed Your Practice
Traditional tools shine simple. Use HB for outlines, 2B-6B pencils for tones. Blend with stumps or tissue. Kneaded erasers lift highlights clean.
Digital rules 2026. Procreate offers ShadeAI plugins for auto-blends. Photoshop neural filters smooth gradients. Blender handles ray-tracing previews free.
AI trends explode. Tools like Meshy AI and Luma Genie turn text prompts into photoreal 3D from basic shapes. Type “shaded sphere top-left light” for a base model. Then refine by hand.
| App | Shading Strength | Perspective Tools | Price |
|---|---|---|---|
| Procreate | Brush blends, textures | QuickShape grids | $12.99 once |
| Photoshop | Dodge/burn layers | Warp, perspective grid | $22.99/mo |
| Blender | Node materials, sculpting | Viewport snaps, cameras | Free |
Hybrid workflows dominate. Pros generate AI bases, then paint details. Check 2026 AI 3D tools for options.
Practice daily with ArtStation references or Loomis books. Your skills grow fast.
Skip These Traps That Keep Your Shapes Looking 2D
Flat shading uses same value everywhere. Vary tones by light angle instead.
Wrong perspective leaves squares undistorted. Always converge to vanishing points.
Straight-line shadows ignore curves. Wrap them around forms.
Over-blending creates mud. Keep crisp edges on highlights.
No cast shadows make shapes float. Ground them always.
Digital flat layers lack clips. Stack with modes for depth.
Fix one error per session. See common 3D drawing pitfalls to learn more.
You got this. Practice turns traps into strengths.
Master light basics and steps for spheres, cubes, cylinders. Grab tools like Procreate or Meshy AI. Dodge flat shading now.
Pick paper or an app. Try one shape today. Five to 10 minutes daily builds pro-level realistic 3D forms from simple shapes.
Share your before-and-after in comments. Which AI trend will you test first? Your drawings level up quick.