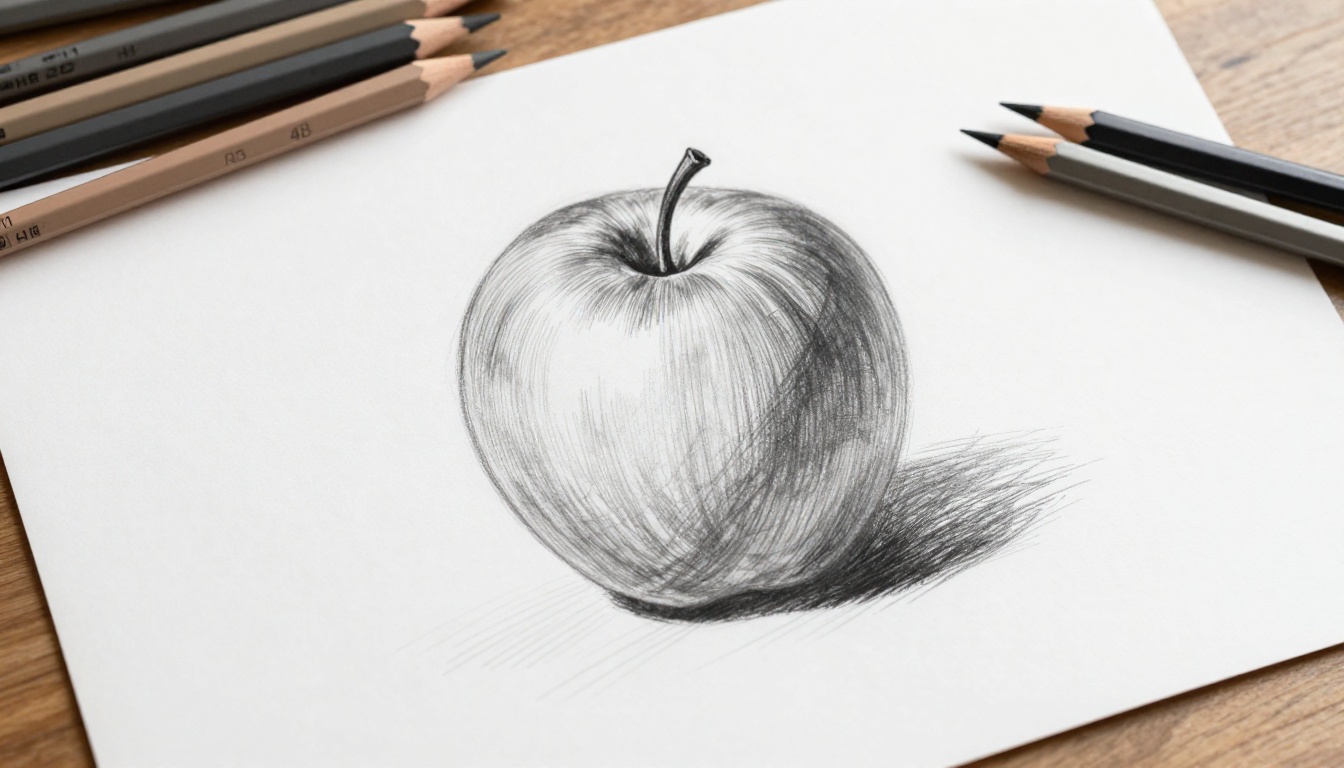
You sketch a simple apple, but it lies flat on the page like a sticker. Then you add shadows, and suddenly it rounds out, sits on the table, catches the light. Shading turns two-dimensional lines into three-dimensional forms that grab attention.
Beginners often skip shading because it seems tricky. In fact, it just needs basic steps and practice. You control light and dark to create depth and realism without advanced skills.
This guide walks you through how to shade drawings step by step for beginners. You’ll gather supplies, set a light source, master techniques, follow a clear process, and avoid pitfalls. By the end, you’ll shade anything from fruit to faces. Let’s make your sketches pop.
Gather Simple Supplies to Start Shading Today
Stock up on basics first. You don’t need pro gear to shade well. A few pencils handle light lines to deep blacks.
Grab graphite pencils like Derwent Graphic in 4H for faint marks, HB for outlines, 2B and 4B for shadows. Hard pencils stay sharp; soft ones lay down rich tones that blend smooth. They cost under $10 for a set.
Pick smooth paper such as Strathmore 400 Series. Its texture holds graphite without smearing too fast. Start with a 9×12 pad.
Add a kneaded eraser. It lifts tones gently for highlights. A blending stump or tissue smooths edges. Keep a sharpener handy.
Household items work too. Use tissue paper instead of stumps at first. Check stores like Blick Art Materials for 2026 beginner kits under $30. These tools let you focus on shading, not shopping hassles.
Set Up Your Light Source for Realistic Results
Pick one light source before shading. Place it top-left on your subject. This choice sets where highlights and shadows fall.
Mark the light direction with a small arrow on your paper. It guides every stroke. Without it, shadows look random.
Think of a sphere under a lamp. Light hits one side bright; the other fades to dark. Observe a real apple the same way. Hold it near a window or bulb. Note how light wraps around curves.
Multiple lights confuse beginners. Stick to one for now. It simplifies decisions and builds strong habits.
Spot the Key Light and Shadow Areas
Squint at your subject. Values pop: bright whites, grays, deep blacks.
Leave highlights white where light hits strongest. They sparkle on rounded tops.
Fill mid-tones light gray on lit sides. They transition smooth.
Add the core shadow at the turn-away edge. It’s darkest because light stops there.
Deepen occlusion shadows in creases where forms touch.
Draw cast shadows on surfaces below. They stretch from the object.
Mark these lightly with HB pencil. For more on shadow types, check this shading 101 guide. Squint again to confirm tones before shading.

Learn Shading Techniques That Make Blending Easy
Master a few methods to build tones fast. Practice on scrap paper first. Each suits different shapes.
Hatching uses parallel lines. Closer lines make darks; space them for lights. Curve them around forms.
Cross-hatching layers lines at angles. It stacks depth quick.
Draw small circles with circulism for even tones on spheres. Overlap lightly.
Stroke dark-to-light for smooth fades. Feather edges by lifting pencil at stroke ends.
Blend with stumps after. Popular picks in 2026 include these plus scribbling and stippling, per recent art trends.
Practice Hatching and Cross-Hatching for Control
Start hatching with even strokes. Press harder for darks. Good for cubes or fabric textures.
Add cross-hatching next. Vary angles for interest. It controls values without mud.
Practice on a box. Lines follow planes. See a step-by-step hatching tutorial for examples.
Use Circulism and Blending for Smooth Skins
Layer tiny circles in circulism. They hide strokes on faces or balls.
Blend right after with a stump. Roll it light for soft gradients. Fingers work but smudge oils.
Test on an egg shape. Results look pro fast.
Follow This Step-by-Step Guide to Shade Any Drawing
Outline a sphere or apple light. Keep lines faint.
Now shade step by step. Go slow; check often.
- Fill mid-tones everywhere light. Use 2B soft.
- Darken core shadow with 4B. Build gradually.
- Add occlusion and cast shadows deepest.
- Blend transitions smooth.
- Erase or lift for sharp highlights.
- Step back; adjust balance.
This works for any form. Layer patient.
Layer from Light Tones to Deep Shadows
Begin faint across the whole area. It sets even base.
Darken step by step. Avoid jumping to black. Layers prevent patchy tones.
Refine Edges and Boost Contrast for Pop
Soften most edges with blending. Keep hard ones crisp, like cast shadow starts.
Push darks next to lights. Squint tests drama.
Your sphere now floats real.

Dodge Beginner Mistakes with These Pro Tips
Watch for muddy grays. Fix by maxing whites and blacks. Full range adds punch.
Don’t ignore your light source. Shadows must match it or forms flatten.
Over-blend kills definition. Use it sparse.
Practice daily on shapes like cubes. Shade from life, not photos first.
Draw a value scale: 5 grays from white to black. Reference it always.
Skip imagination until basics stick. Ten minutes a day builds skill. For fixes on errors, read common shading mistakes advice.
Shading transforms flat sketches into lively art. You now know supplies, lights, techniques, steps, and fixes.
Grab your pencil. Shade a sphere today. Progress comes with practice.
What will you shade first? Share in comments. Try textures next for more fun.